Looking for a low-maintenance houseplant that doesn’t ask for much but gives back a lot? Meet the spider plant—a crowd favorite for beginner gardeners, seasoned green thumbs, and basically anyone who wants a touch of green indoors without a ton of effort.
This post breaks down everything you need to know about this stylish, hard-to-kill plant. We’ll talk about why people love it (hint: it’s more than just the looks), how to plant it, when and how to water, what to do with those baby spiderettes, and how to keep it thriving all year long. You’ll also learn what to watch for—like brown tips or droopy leaves—and how to fix common issues fast.
The goal here? Help you feel confident taking care of your spider plant. By the end of this guide, you’ll know exactly what to do (and what not to do) to keep it happy, healthy, and growing like crazy.
Let’s get into it.
Benefits of Growing a Spider Plant
So, what makes the spider plant such a hit? Besides being easy on the eyes with its arching green-and-white leaves, it actually does stuff for your space.
First off, it’s one of the best natural air purifiers out there. According to NASA’s Clean Air Study (yep, that NASA), spider plants can help remove toxins like formaldehyde and carbon monoxide from indoor air.
Another reason people love spider plants? They’re safe for pets. Unlike some houseplants that can be toxic to cats and dogs, this one’s considered non-toxic. That said, pets might still chew on the leaves, so maybe keep it out of reach if your furry friend has a thing for greens.
They’re also just… kind. Spider plants don’t throw a fit if you forget to water them once in a while. They’re forgiving, adaptable, and bounce back easily from a bit of neglect.
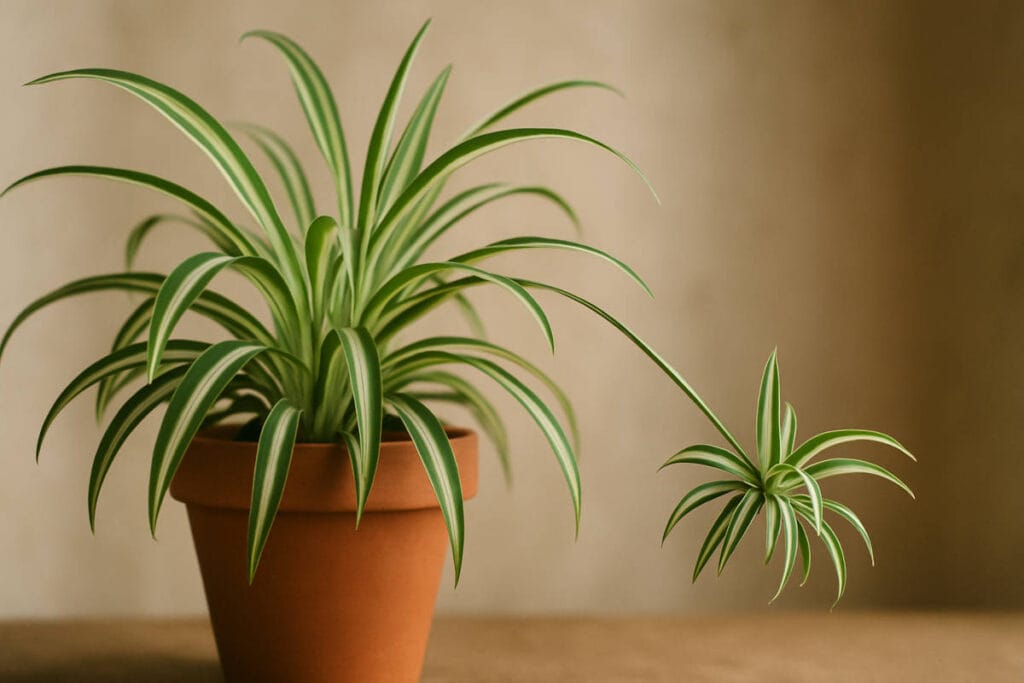
And when they’re happy, they send out these cute little baby plants—called “spiderettes”—that hang down like tiny plant parachutes. You can leave them on for a full, trailing look or snip them off to start new plants. Free décor? Yes, please.
Bottom line: spider plants are low-effort, high-reward. Clean air, happy vibes, and a house that looks more alive—what’s not to love?
You may also like:
- Tomato Plant Leaves Turning Yellow? 7 Causes and Easy Fixes
- Dragon Tail Plant Guide: How to Grow Epipremnum Pinnatum
How to Plant a Spider Plant
Alright, ready to pot your spider plant? It’s super simple, and you don’t need to be a plant expert to get it right.
First: Pick the Right Pot
Look for a pot with drainage holes at the bottom. Spider plants hate sitting in soggy soil, and without proper drainage, their roots can rot fast. If the pot’s cute but has no holes, skip it (or grab a drill and make your own).
Choose the Right Soil
Go with a light, well-draining potting mix. Something labeled for indoor plants or houseplants usually works great. Avoid heavy garden soil—it holds too much water and suffocates the roots. If you want to be extra, mix in a bit of perlite or sand to boost drainage.
Light Matters
Spider plants love bright, indirect sunlight. That means near a window that gets lots of light, but not directly in the path of harsh midday sun. Too much direct sunlight can burn the leaves, leaving you with crispy tips. Not cute.
Got lower light? It can still grow—it just won’t be as bushy or fast.
Temperature & Humidity
This plant likes it cozy—think 65–80°F (18–27°C). It’ll tolerate cooler nights but doesn’t enjoy temps below 50°F. And while it doesn’t need high humidity, it definitely appreciates it. Dry air can lead to browning leaf tips, so if your home’s air is super dry, consider a small humidifier or just mist the plant occasionally.
That’s it—you’ve planted your spider plant. Now the fun part: watching it settle in and start growing.
You may also like:
- 7 Plants That Attract Dragonflies and Keep Mosquitoes Away Naturally
- Planter Pool Landscaping: 5 Gorgeous Designs + Maintenance Guide
Watering Your Spider Plant the Right Way
Here’s the thing: spider plants don’t like to stay wet, but they don’t want to dry out completely either. It’s all about balance—and once you get the hang of it, it’s easy.
How Often Should You Water?
Generally, once a week does the trick. But don’t stick to a strict schedule—check the soil first. If the top inch feels dry, it’s time to water. If it’s still moist, wait a couple more days.
In warmer months, your plant might need water more often. When it’s cooler or during winter dormancy, it’ll need less. Pay attention to the seasons and the plant’s vibe.
How to Water
Give it a deep watering until you see water draining from the bottom of the pot. Let it all drain out—don’t let the pot sit in a saucer full of water. That’s a one-way ticket to root rot.
If you’re using tap water and notice the tips of your spider plant turning brown, minerals like fluoride or chlorine could be the culprit. Easy fix? Let tap water sit out overnight before using, or switch to filtered water.
Quick Signs Something’s Off
- Leaves yellowing or mushy? You’re overwatering.
- Leaves drooping or crispy? Probably underwatered.
- Brown tips? Could be dry air, water quality, or too much fertilizer.
The more you observe your plant, the better you’ll get at reading what it needs. And once you find that watering sweet spot, your spider plant will thank you—with new growth and baby spiderettes.
You may also like:
- How to Protect Plants from Frost: 6 Proven Methods for a Healthy Garden
- Brazilian Wood Plant Care: How to Grow It in Soil or Water Indoors
Fertilizing Your Spider Plant
Fertilizer isn’t a must, but if you want your spider plant to really shine—lush, fast-growing, and producing lots of spiderettes—feeding it right makes a difference.
What Kind of Fertilizer Should You Use?
A basic, balanced liquid houseplant fertilizer works well. Look for one with equal parts nitrogen, phosphorus, and potassium (like 10-10-10 or 20-20-20). You can also go with an organic option like worm castings tea or fish emulsion if you’re into natural gardening.
How Often to Feed
During the active growing season—spring through early fall—fertilize once a month. In winter? Skip it. The plant slows down in cold months and doesn’t need the extra boost.
Keep It Light
Spider plants are sensitive to over-fertilizing. If you notice brown leaf tips and you’ve ruled out water or humidity, too much fertilizer might be the cause. When in doubt, dilute the fertilizer to half strength. Less is more here.
Pro Tip
If your spider plant’s been in the same soil for over a year and looks a little tired (less growth, pale leaves), a gentle feeding routine can bring it back to life.
Feeding a spider plant isn’t complicated, but it’s one of those small habits that can make a big impact over time.
You may also like:
Transplanting and Repotting a Spider Plant
So, how do you know it’s time to repot your spider plant? Easy. If roots are growing out of the drainage holes, circling around the surface, or your plant seems cramped and unhappy, it’s probably ready for a bigger home.
When to Repot
Plan to repot about every 1–2 years. Spring is the best time—your plant’s waking up from winter and ready to grow. But if it’s super root-bound or struggling, don’t wait.
How to Repot (Step-by-Step)
- Gently remove the plant from its current pot. If it’s stuck, squeeze the pot sides or slide a butter knife around the edges.
- Loosen the roots a bit, especially if they’re tightly packed. Trim off any mushy or dead ones.
- Choose a pot that’s about 1–2 inches wider than the old one. Not too big—you don’t want the roots drowning in excess soil.
- Add fresh potting mix, place the plant, then fill in around it. Press the soil down gently, but don’t pack it too tight.
- Water thoroughly and let it drain well.
Aftercare
Don’t freak out if your plant looks a little shocked right after repotting. That’s normal. Just keep it in a comfy spot with indirect light and regular care—it’ll bounce back quickly.
Repotting gives your spider plant fresh nutrients, more room to stretch out, and a little reboot. If it’s been a while since yours had a change, it’s probably due.
You also like:
Pruning and Grooming Your Spider Plant
Spider plants don’t need a ton of grooming, but a little cleanup now and then goes a long way in keeping them looking fresh and healthy.
When and Why to Prune
Prune your spider plant when:
- The leaves look ragged or yellowed
- The tips are brown
- It’s getting too big or wild
- You want to control the number of spiderettes
Trimming away dead or damaged leaves helps the plant focus its energy on healthy growth. It also keeps your plant from looking like it’s been through a wind tunnel.
How to Prune
- Grab a pair of clean, sharp scissors or pruning shears.
- Cut leaves at the base if they’re fully dead or yellow.
- For brown tips, you can trim just the damaged ends—angle the cut to match the natural shape of the leaf.
- Got spiderettes hanging everywhere? Snip them off close to the base if you want a cleaner look or if you plan to propagate.
Keep It Clean
Every now and then, wipe the leaves down with a damp cloth to remove dust. It helps with photosynthesis and keeps the plant looking sharp.
Pruning isn’t just about looks—it actually boosts your plant’s health. Think of it like a haircut that makes your spider plant feel brand new.
You may also like:
Propagating Spider Plants
One of the coolest things about spider plants? They basically propagate themselves. Those little offshoots—aka spiderettes—are like free baby plants just waiting to grow.
What Are Spiderettes?
When your plant is happy and mature, it sends out long stems with baby plants attached. These are the spiderettes. You can leave them on for a cascading look, or snip them off and grow new plants.
How to Propagate
You’ve got two easy options:
1. Root in Water:
- Cut the spiderette off close to the main stem.
- Place it in a glass of water—just enough to cover the bottom.
- Set it somewhere with bright, indirect light.
- Wait for roots to grow (usually takes 1–2 weeks).
- Once roots are about an inch long, transfer to soil.
2. Root Directly in Soil:
- Snip off the spiderette.
- Plant it in a small pot with moist, well-draining soil.
- Keep the soil lightly damp and place the pot in indirect light.
- In a few weeks, it should take root.
Or, if the spiderette is still attached to the mother plant, you can pin it down into soil in a nearby pot and let it root while still attached. Once it’s rooted, just snip the stem.
Spider plant propagation is seriously satisfying. It’s free, fun, and gives you more plants to keep, gift, or trade. Win-win.
You may also like:
Common Spider Plant Problems (and Solutions)
Even though spider plants are super easygoing, they can still run into a few hiccups. The good news? Most problems are easy to fix once you know what to look for.
Brown Leaf Tips
This is probably the most common issue, and it can come from:
- Fluoride or chlorine in tap water
- Dry air
- Over-fertilizing
Fix: Try switching to filtered water or let tap water sit out overnight. Mist the plant occasionally or run a humidifier if your home is really dry. And don’t overdo it with fertilizer—once a month during the growing season is plenty.
Yellow Leaves
Could mean too much water, not enough light, or old age.
Fix: Check the soil—if it’s soggy, let it dry out before watering again. Make sure your plant’s getting enough indirect sunlight. Trim off any old, yellowed leaves to clean it up.
Drooping or Wilting
Usually a sign of either overwatering or underwatering.
Fix: Feel the soil. If it’s wet and the plant’s droopy, cut back on watering and let it dry out. If it’s bone dry, give it a deep drink and see if it perks up in a day or two.
Pests
Spider mites, aphids, or mealybugs can occasionally show up, especially in dry environments.
Fix: Wipe leaves with a damp cloth or spray with a mix of water and a little dish soap. Neem oil also works well as a natural treatment.
Most spider plant problems are just communication. The plant’s telling you something’s off—it’s up to you to listen and adjust.
You may also like:
Expert Tips for Thriving Spider Plants
Now that you know the basics, let’s level up. These quick tips can take your spider plant from “just surviving” to “absolutely thriving.”
Rotate for Even Growth
Spider plants lean toward the light. If you always leave the same side facing the window, you’ll get lopsided growth. Simple fix? Give the pot a quarter turn every week or so. Easy win.
Don’t Overthink It
Spider plants are chill. If you forget to water for a few days, or miss a pruning session, it’s not the end of the world. They bounce back. Just stay consistent most of the time and you’ll be fine.
Repot Before It Gets Too Cramped
If the roots are pushing out of the drainage holes or the plant seems too dense, go ahead and repot. Giving it more space = more growth and more baby spiderettes.
Style It Your Way
Want a plant that drapes dramatically off a shelf? Go for it. Prefer a tidy, compact look in a tabletop pot? Prune those spiderettes. Spider plants are flexible and fit whatever style you’re going for.
Keep an Eye on Light
Too much direct sunlight can cause leaf burn. Not enough light can make growth slow and leggy. Bright, indirect light is the sweet spot—by a north or east-facing window is usually perfect.
Bonus: Mix with Other Indoor Plants
Spider plants play well with others. Pair them with peace lilies, pothos, or ferns for an indoor jungle that purifies your air and looks amazing.
These little adjustments make a big difference. Once you get into a rhythm, your spider plant will reward you with vibrant leaves and tons of new growth.
You may also like:
Conclusion
So, is the spider plant worth adding to your indoor garden? Absolutely.
It’s low-maintenance, pet-friendly, good-looking, and does a solid job cleaning the air. As long as you give it decent light, avoid overwatering, and trim it up when needed, you’ll have a happy, healthy plant that keeps growing—and giving.
Plus, it practically clones itself, so one spider plant can turn into many. That’s great news for your home, your friends, or anyone you want to gift a little greenery to.
Now you’ve got everything you need to care for your spider plant with confidence. Give it a spot to shine and watch it thrive.
Looking to grow your indoor herb garden next? Check out our complete guide on how to grow garden sage—it’s another easy, aromatic favorite!
FAQ: Spider Plant Care
1. How often should I water a spider plant?
Water once a week or when the top inch of soil feels dry. Avoid letting it sit in soggy soil.
2. Why are the tips of my spider plant turning brown?
Common causes include tap water with fluoride or chlorine, low humidity, or too much fertilizer.
3. Can spider plants grow in low light?
Yes, but they grow best in bright, indirect light. Low light slows growth and may reduce spiderette production.
4. Are spider plants safe for pets?
Yes, spider plants are non-toxic to cats and dogs. Still, pets may chew on them, which could cause mild stomach upset.
5. When should I repot my spider plant?
Every 1–2 years, or when roots start growing out of the pot or the plant seems too crowded.
6. How do I propagate a spider plant?
Cut off a spiderette, root it in water or soil, and wait for it to grow. It’s super easy and beginner-friendly.
7. What’s the best soil for spider plants?
Use a light, well-draining indoor potting mix. Avoid heavy soils that retain too much moisture.
8. How do I get rid of pests on my spider plant?
Wipe leaves with a damp cloth or use a mild dish soap spray. Neem oil works too.