Thinking about starting a home garden? Then you’ve probably heard people talking about using a compost bin. And let’s be honest… it sounds like one of those eco-friendly projects that’s either super rewarding or a total mess if you don’t know what you’re doing.
The good news? Setting up a compost bin is way easier than you think. You don’t need a huge backyard, expensive gear, or hours of free time. In fact, composting can quickly become one of the smartest gardening habits you’ll develop.
In this guide, you’ll find everything you need to know about compost bins: what they are, the different types, how to set one up, what you can (and can’t) toss inside, and how to maintain it without ending up with a smelly pile of regret.
By the time you’re done reading, you’ll know exactly how to turn kitchen scraps and yard waste into rich, dark compost your plants will love.
Ready? Let’s dive in.
What Is a Compost Bin and Why Does Your Garden Need One?
Let’s keep it simple: a compost bin is a container where organic waste breaks down naturally until it turns into compost—a nutrient-packed material that looks and feels like dark, crumbly soil. It’s basically nature’s recycling system happening right in your backyard (or even on your balcony if space is tight).
So, why should you care? Because good soil doesn’t just happen by itself. If you want healthy plants, you need healthy soil. And compost is one of the easiest ways to improve it.
When you add compost to your garden beds or potted plants, you’re giving them a slow-release, all-natural fertilizer. It improves soil structure, helps retain moisture, and supports beneficial microbes that keep your plants thriving. You’ll notice stronger roots, greener leaves, and better harvests.
And hey, if you’re into sustainability, there’s that bonus too. Using a compost bin means you’re sending less food and yard waste to landfills. Less garbage, more garden goodness. Win-win.
You may also like:
- 11 Container Gardening Ideas for Small Spaces and Patios
- Top 7 Pet Roses That Won’t Harm Your Dog or Cat
Types of Compost Bins for Home Gardens
Now that you know why a compost bin matters, let’s talk about the different types you can choose from. Not all bins are created equal, and the best one for you depends on your space, budget, and how hands-on you wanna be.
Stationary Compost Bins
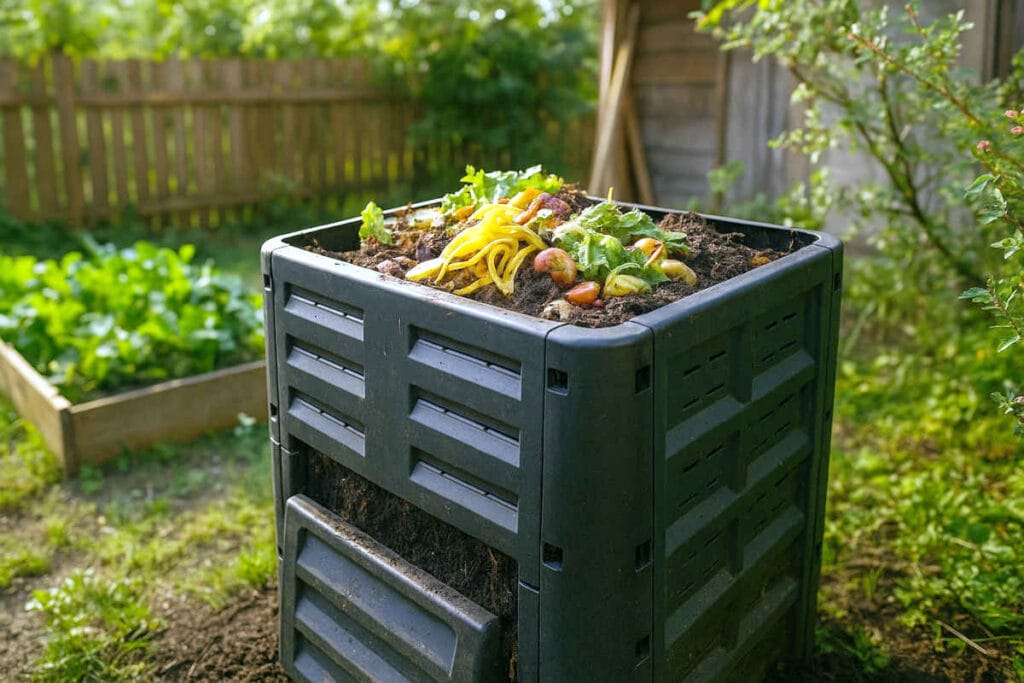
These are the classic ones. Think of a big plastic or wooden box sitting in your backyard. You toss in your organic waste, let nature do its thing, and wait. They’re great if you have a bit of space and don’t mind doing some manual turning every now and then.
Pros:
- Cheap (or even free if you DIY it)
- Simple setup
- Handles large volumes of yard waste
Cons:
- Slower decomposition
- You’ll need to turn the pile with a garden fork or shovel
Tumbling Compost Bins
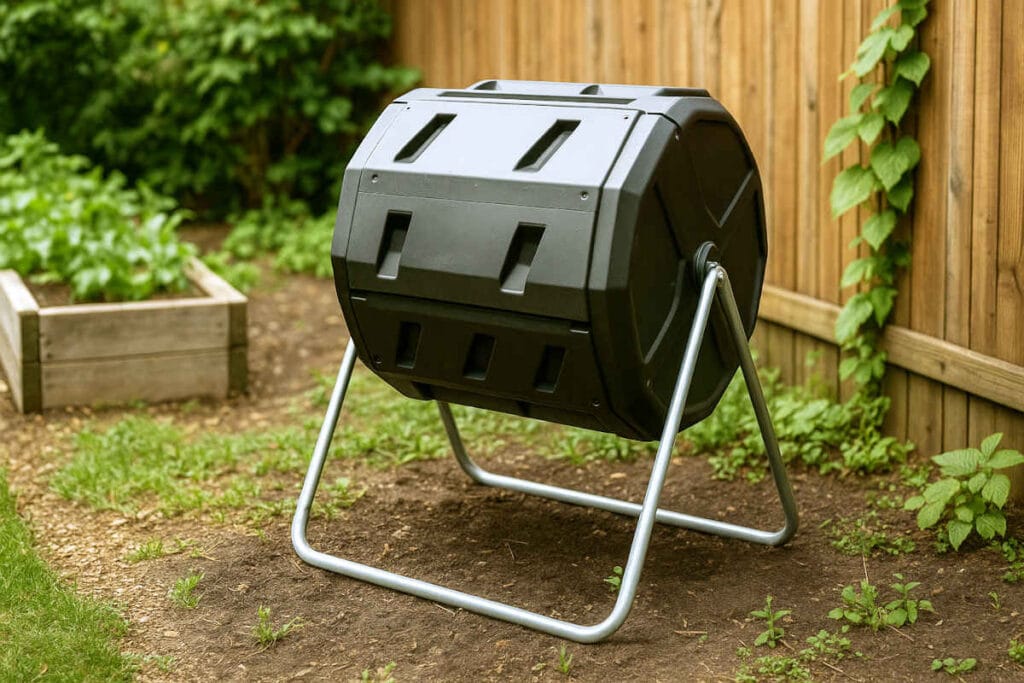
If you want faster results without the manual labor, tumblers are worth a look. They’re barrel-shaped and sit on a frame, making it easy to spin and mix the contents.
Pros:
- Faster composting (more aeration)
- Easy to turn—just give it a spin
- Sealed design helps keep pests out
Cons:
- More expensive
- Smaller capacity
Indoor Compost Bins
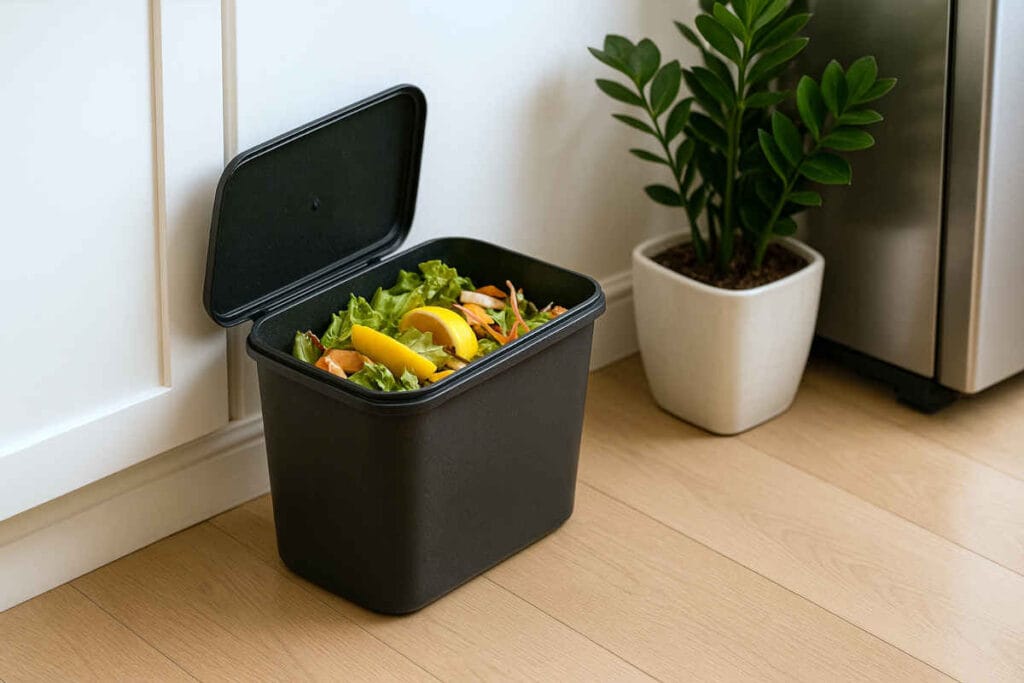
No backyard? No problem. Indoor options like worm composters (vermicomposting) or Bokashi bins let you compost inside without nasty smells (if you manage them right).
Pros:
- Space-saving
- Ideal for apartments or small homes
- Year-round composting
Cons:
- Smaller scale
- Some learning curve (especially with worms)
DIY Compost Bin Ideas

Feeling crafty? You can build your own bin with pallets, old garbage cans, or even stacked bricks. As long as there’s airflow and room for materials to break down, it’ll work.
You may also like:
How to Set Up Your Compost Bin Step by Step
Alright, time to get your hands dirty. Setting up your compost bin isn’t rocket science, but a few smart decisions upfront will save you headaches later.
Step 1: Pick the Right Spot
First thing: location matters. If you’re placing your bin outdoors, go for a spot with good drainage. You don’t want puddles under your bin after it rains. Some sun exposure helps speed things up, but too much heat can dry the pile out. Partial shade is a sweet spot for most gardeners.
If you’re composting indoors, just make sure the bin is easily accessible and away from direct sunlight. Under the sink or in a pantry corner works well.
Step 2: Start Layering Materials
Here’s where the magic begins. Compost needs a balance of “greens” (nitrogen-rich stuff) and “browns” (carbon-rich stuff).
- Greens: Veggie peels, fruit scraps, coffee grounds, fresh grass clippings.
- Browns: Dry leaves, shredded newspaper, cardboard, small twigs.
Pro tip: Start with a layer of browns at the bottom to help with airflow.
Step 3: Add Water (But Not Too Much)
Your compost pile should feel like a wrung-out sponge. If it’s too dry, decomposition will slow down. If it’s too wet, you’ll invite bad smells and pests.
Spray a little water between layers if needed—but skip dumping a whole bucket in there.
Step 4: Keep It Breathing
Oxygen is a big deal in composting. Without it, your pile turns into a slimy, stinky mess. Mix or turn your compost regularly to keep things aerated. If you’ve got a tumbler, just give it a spin every few days.
You may also like:
Maintaining and Troubleshooting Your Compost Bin
So, you’ve got your compost bin set up. Nice work! However, a little ongoing care makes all the difference between rich, earthy compost and a wet, smelly disaster.
Keep It Moving: Turn the Pile
If you’re using a stationary bin, grab a pitchfork or shovel and turn the pile about once a week. This gets oxygen flowing and speeds up decomposition. Tumbling bins make this part easy—just give it a few spins.
Watch the Moisture
Too dry? Your compost will sit there doing nothing. Too wet? Hello, bad smells.
Aim for that “damp sponge” feel. If it’s too dry, sprinkle some water. If it’s too wet, toss in extra browns like dry leaves or shredded cardboard.
Balance Your Greens and Browns
A common rookie mistake: dumping in too many kitchen scraps (greens) without enough browns. That’s when things start to stink.
If your compost smells sour or like ammonia, add more carbon-rich materials. If it’s just sitting there, lifeless, you might need more greens to kickstart the microbes.
Pest Patrol
If you spot flies, rodents, or other unwanted guests, check for exposed food scraps. Always bury fresh waste under a layer of browns.
For outdoor bins, keeping a secure lid helps too.
Speed Things Up (Optional)
Want faster compost? Chop your scraps smaller, turn the pile more often, and keep the moisture and air levels just right.
Composting is part science, part common sense. You’ll get a feel for it pretty quickly.
You may also like:
When and How to Harvest Your Finished Compost
Alright, you’ve been patient, turned your pile, kept it moist but not soggy… Now comes the fun part: harvesting your compost.
But how do you know when it’s ready? Here’s what to look for:
Signs Your Compost Is Ready
- Color: Dark brown, almost black.
- Texture: Crumbly and soil-like.
- Smell: Earthy and pleasant—not sour, rotten, or ammonia-like.
- Contents: You shouldn’t recognize any of the original food scraps or leaves (except maybe a few stubborn twigs or eggshell bits).
If it still looks like yesterday’s salad or last month’s lawn clippings, it needs more time.
How to Harvest
For stationary bins, just scoop from the bottom where the finished compost settles. Some bins have a little hatch for easy access.
With tumbler bins, empty the whole thing once the batch is done.
For DIY open piles, use a shovel or garden fork to remove the finished layer and leave any unfinished material behind to keep breaking down.
Optional: Sifting Your Compost
If you want super fine compost (great for seed starting or potted plants), run it through a mesh screen or homemade compost sifter. Bigger chunks that don’t pass through? Toss them back into the bin for another round.
How to Use Your Compost
- Mix it into garden beds.
- Top-dress around existing plants.
- Blend it into potting soil for containers.
- Feed your tomato plants (seriously—they’ll love it).
Your soil will thank you.
You may also like:
Conclusion: Give Your Plants the Nutrients They Deserve
So, is a compost bin worth it for your home garden? Absolutely. It’s one of the simplest ways to recycle organic waste and turn it into something your plants will love.
By setting up a compost bin, you’re improving soil health, reducing landfill waste, and making your gardening life a whole lot easier (and cheaper).
The best part? You don’t need fancy tools or a huge yard. Just a bit of kitchen waste, some dry leaves, and a little patience.
If you’ve made it this far, you’re already ahead of most beginner gardeners. Now it’s time to put that compost to good use.
Want a great way to use your fresh compost? Check out our full guide on how to grow tomato plants in pots.
FAQ: Compost Bin for Home Gardens
1. What can I put in my compost bin?
You can add fruit and vegetable scraps, coffee grounds, tea bags, eggshells, grass clippings, dry leaves, shredded newspaper, and small twigs. Avoid meat, dairy, oily foods, pet waste, and anything treated with chemicals.
2. How long does it take to get finished compost?
It usually takes between 2 to 6 months, depending on factors like temperature, moisture, material balance, and how often you turn the pile.
3. Where’s the best place to put a compost bin?
For outdoor bins, choose a spot with good drainage and partial sun. Indoors, keep your bin somewhere accessible but out of direct sunlight, like under the kitchen sink or in a pantry corner.
4. How do I keep my compost bin from smelling bad?
Maintain a good balance between greens and browns, avoid overloading with wet food scraps, and keep the pile aerated. If it smells, add more dry materials like shredded cardboard or dry leaves.
5. Can I compost indoors if I don’t have a garden?
Yes! Indoor compost bins like Bokashi systems or worm composters (vermicomposting) are great for apartments and small spaces. They’re designed to control odors and work on a smaller scale.
6. Do I need to turn my compost?
For faster decomposition and odor control, yes. If using a tumbler compost bin, just rotate it a few times every few days. For stationary bins, turn the pile manually with a garden fork or shovel.
7. What if my compost isn’t breaking down?
Check for balance. If it’s too dry, add water. If it’s too wet, add browns. And make sure you’re adding a good mix of materials and turning it regularly to get air flowing.